Why the Haunch? –
This is an excerpt from “The Woodworker: The Charles H. Hayward Years: Volume III” published by Lost Art Press.
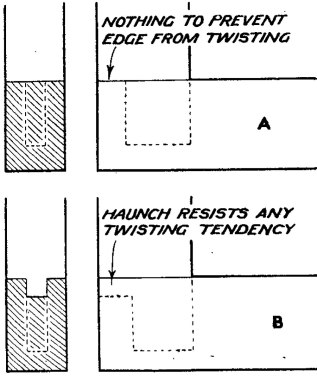
The probability is that the haunch came into being as a matter of necessity. You know how, when making a door with grooved-in panel, the plough has to run right through so that a haunch to fill in the groove at the end simply has to be cut. It was soon perceived, however, that it does strengthen the joint because it opposes any twisting tendency at the otherwise unsupported end of the rail. This is explained in Fig. 1, which shows at A how there is nothing to prevent the edge from twisting should the wood be liable to do so, whilst at B the haunch offers direct resistance.
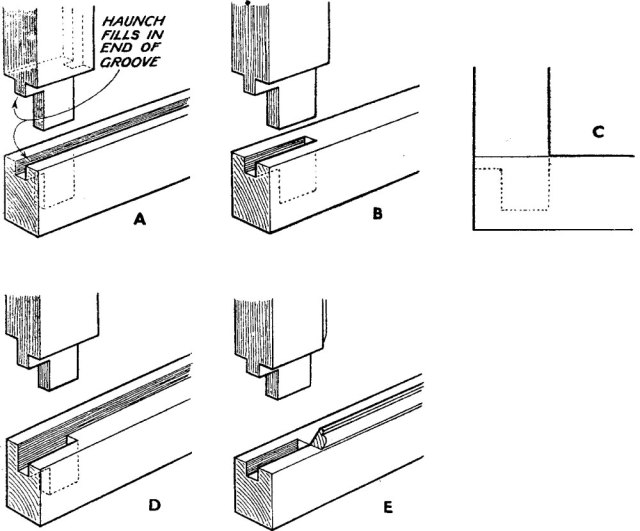
Some applications of the haunch are given in Fig. 2. At A is the grooved frame-work in which the haunch is essential to fill in the end of the groove. B is a plain, square-edged framework, whilst C is the same, but has what is known as the secret haunch. In many ways this is the best type of haunch. It is entirely concealed, it offers full resistance to twisting, and it is stronger since the short grain to the outside of the mortise is not cut away unduly. It can be applied to all tenon joints except the grooved type at A in which the haunch must fill in the groove end. A rebated framework joint is given at D, whilst E gives the application for a moulded and rebated framework.
The haunch should always be of the same thickness as the tenon, even when the groove (if any) is of different size. Take A, Fig. 2. It might easily happen that the groove was narrower than the tenon, and in this case it would merely be a case of enlarging the groove at the end to line up with the mortise.
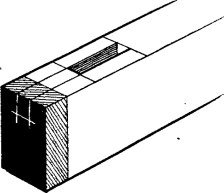
When marking out the joint, always carry the mortise gauge along to the end of the wood as in Fig. 3, and continue down the end grain. The depth at the end can also be gauged in. The marks will not matter because they are removed when the waste allowance (shown shaded) is cut off. The haunch length should be squared across the outer edge of the tenoned part during the original marking out. A chisel should be used as this gives exact marking. In the case of the secret haunch at C, Fig. 2, allow it to stand in a trifle (see x) so that it is not revealed in subsequent trimming.
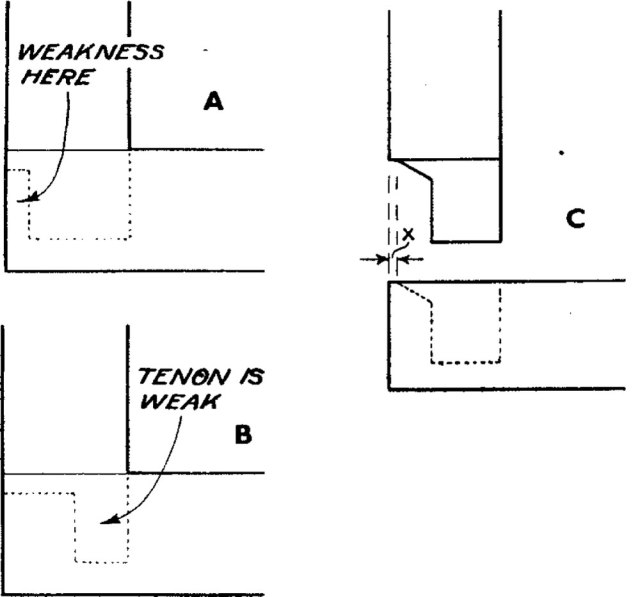
The proportion of the joint has to be considered (see Fig. 4). At A the tenon is so wide that the short grain beneath the haunch has little strength. If the tenoned piece were wrenched round it would probably split open the mortise. B goes to the other extreme, the haunched portion being strengthened at the expense of the tenon. At C a good proportion is shown; each part compromising to give the required strength.
— MB